How to use Zoom in SoulAdvisor for individual and class/group appointments
Zoom is a video communications app that allows you to set up virtual video calls.
How it works
After you set up Zoom with SoulAdvisor successfully, SoulAdvisor will automatically create Zoom meetings for your online appointments. Zoom can be used for both individual and class/group appointments.
- Individual appointment: The Zoom meeting will be created automatically after the appointment is confirmed. The Zoom meeting will be updated or deleted if the appointment is rescheduled or cancelled.
- Class/Group: The Zoom meeting will be created automatically for your class after the first booking of that class is confirmed. If your client reschedules to a new class, they will receive a new Zoom link for that class. The Zoom meeting will be deleted when you cancel your class.
- The Zoom meeting will be sent to you and your client in a confirmation email.
- You and your client can also find the Zoom meeting in your appointment details or reminder email.
- Your clients need to be admitted by you before they can join the meeting.
- Your clients don’t need to have a Zoom account to attend your online session.
How to set up Zoom with SoulAdvisor
The Zoom meeting will be generated only after you have selected Zoom for your service and also connected with it successfully.
There are two ways to set up Zoom. You could set up Zoom from the Integration menu or during service setup.
Set up Zoom from the "Integration menu"
1. Log in to your Dashboard
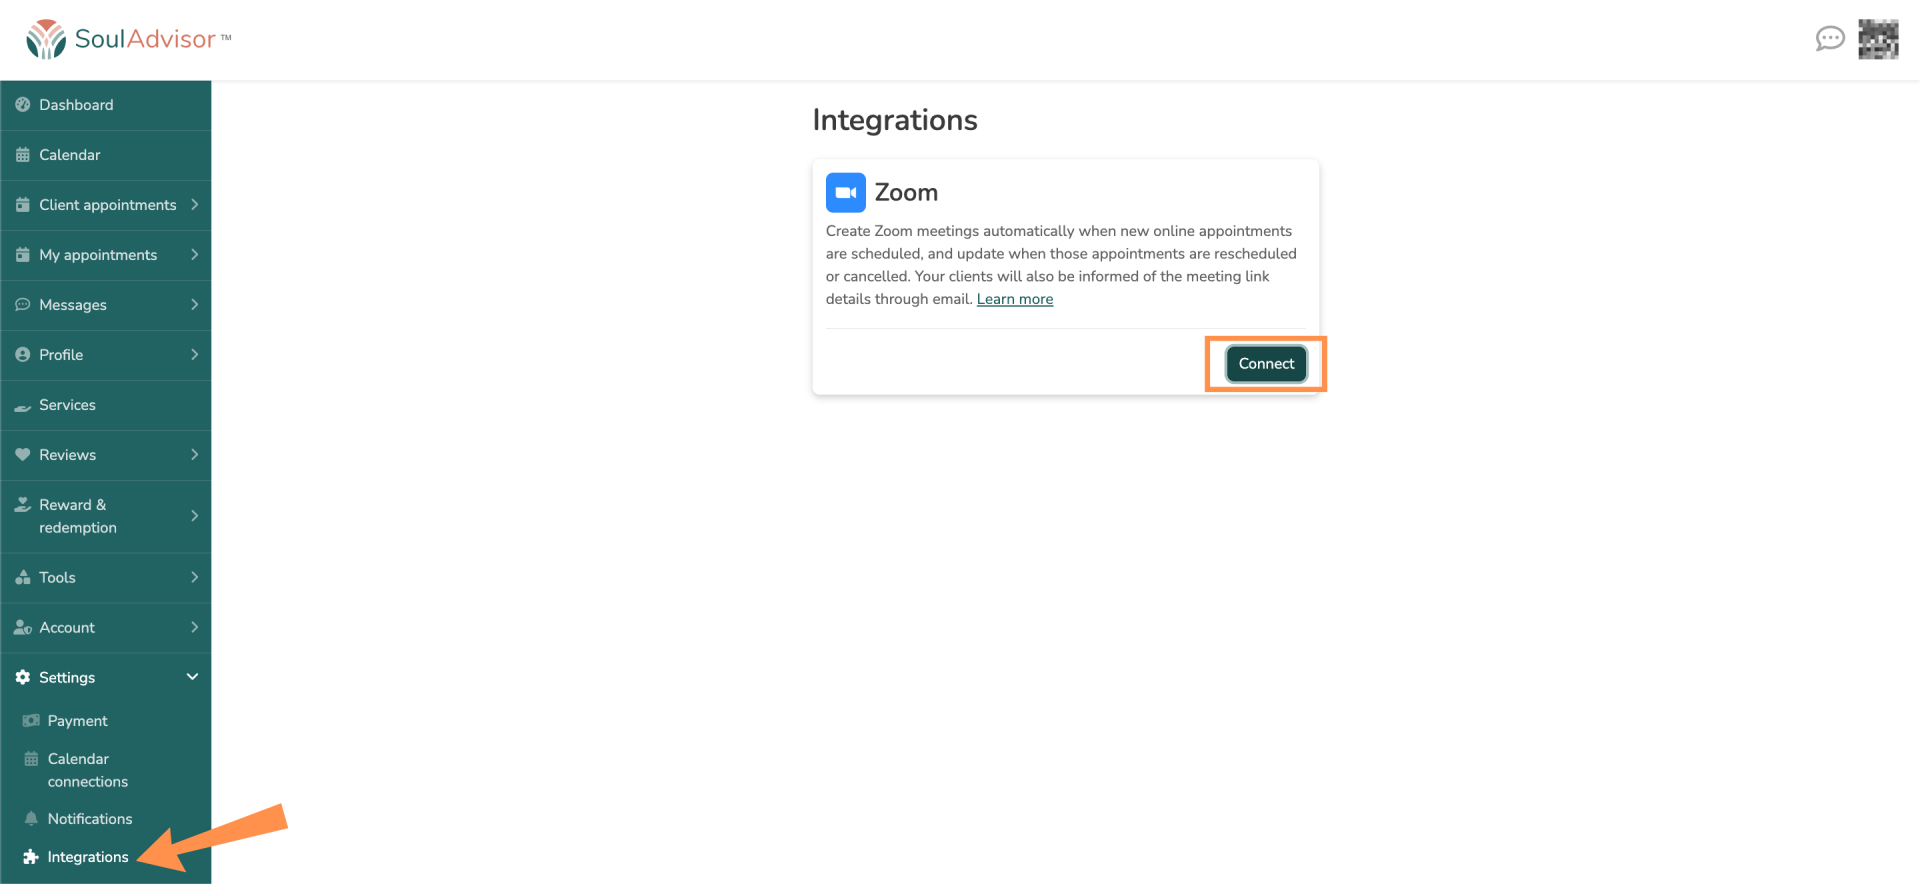
2. Go to Settings > Integrations
3. Under Zoom, Click on "Connect"

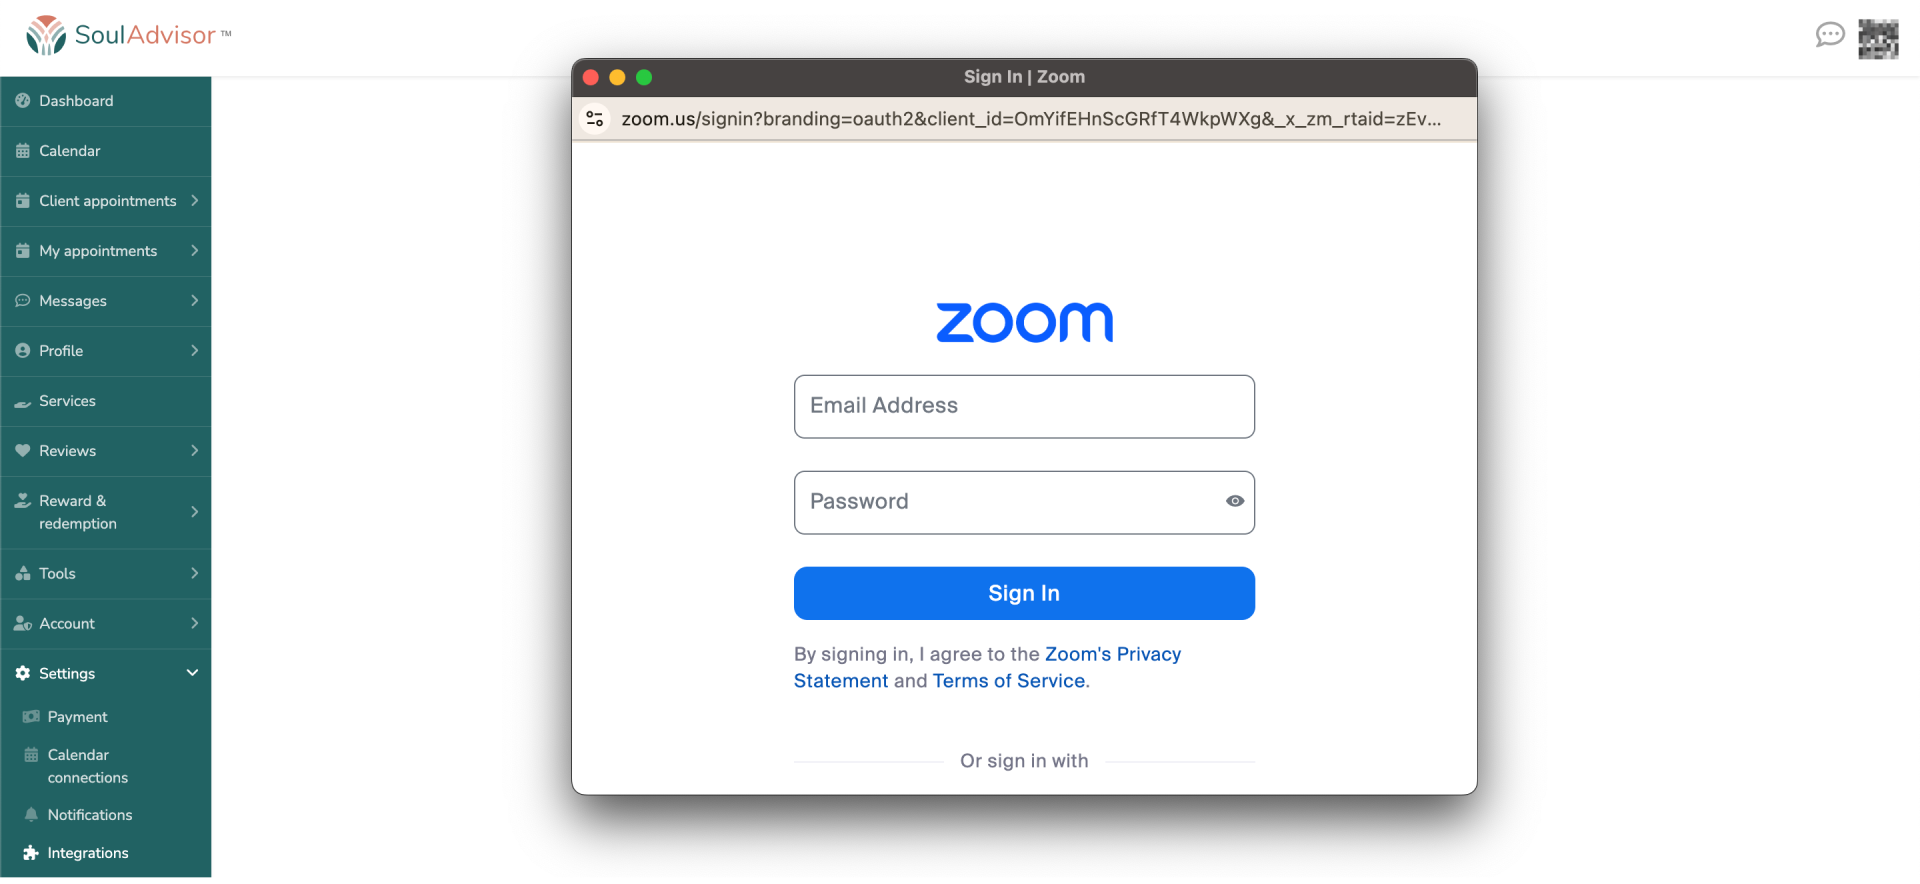
4. Then follow the prompts

After you finish connecting with Zoom, you need to select Zoom for your online services (see below):
- Create a new service or edit any services
- Check on "Online" session type then select "Zoom"
- Save your changes

You have now successfully set up Zoom in SoulAdvisor. Below is the alternative way to set up Zoom in SoulAdvisor.
Set up Zoom during the service setup
1. Create a new service or edit any services
2. Check on "Online" > "Zoom" then click on "Click here" to connect to Zoom

3. Follow the prompts

4. Save your changes and the Zoom setup is done.
Disconnect your Zoom account.
After you disconnect from Zoom, the links that have been already created will continue to work and there will be no link generated for future bookings. You could disconnect in SoulAdvisor or your Zoom app.
Disconnect in SoulAdvisor
- Log in to your Dashboard
- Go to Settings > Integrations
- Click on “Disconnect” and follow the prompt

Disconnect in the Zoom app.
- Log in to your Zoom account and navigate to the Zoom marketplace
- Click on "Manage" > "Added Apps"
- Search for Souladvisor, click on "Remove" and follow the prompt.
Notes:
- One Zoom account can only be used with one practitioner.
- You can use free or paid Zoom accounts in SoulAdvisor. However, please be aware of your Zoom account features to ensure your session ends properly (for example, ensuring your session does not end abruptly because you have run out of time on your free plan). For more details about the Zoom plan features, please visit here.